You need an account with an Identity Provider to use SAML with Quillix. Quillix requires SAML 2.0 and will function as a Service Provider. Before setting up Quillix, you will need to create an Application with the Identity Provider and setup your users. Quillix (the Service) will be the SAML initiator.
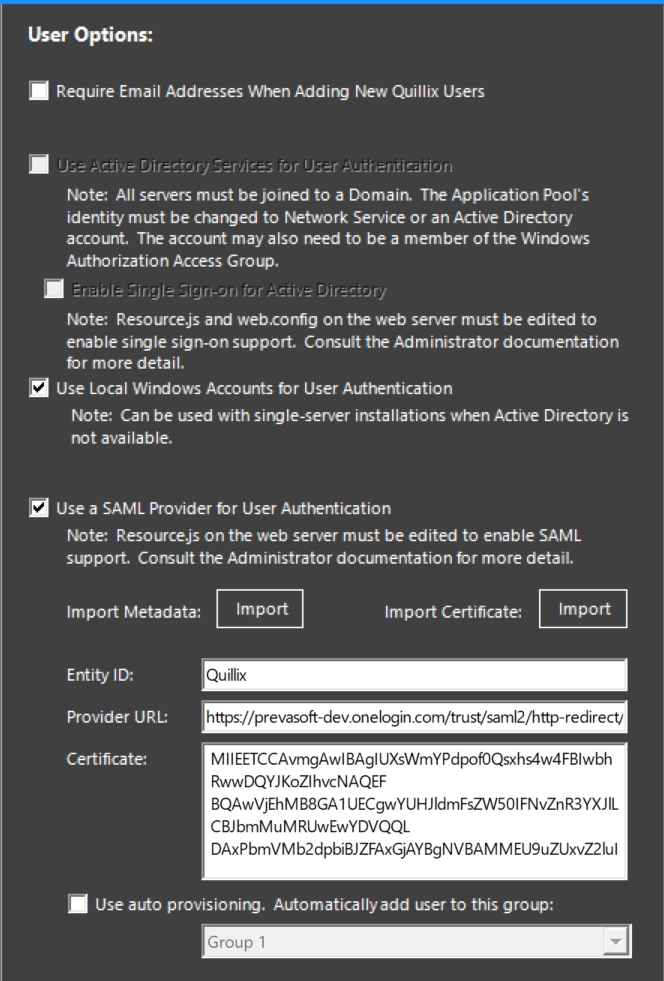
SAML Support must be enabled in the Settings Panel in the Quillix Process Manager. From the Quillix Process Manager:

Figure 1 - User options
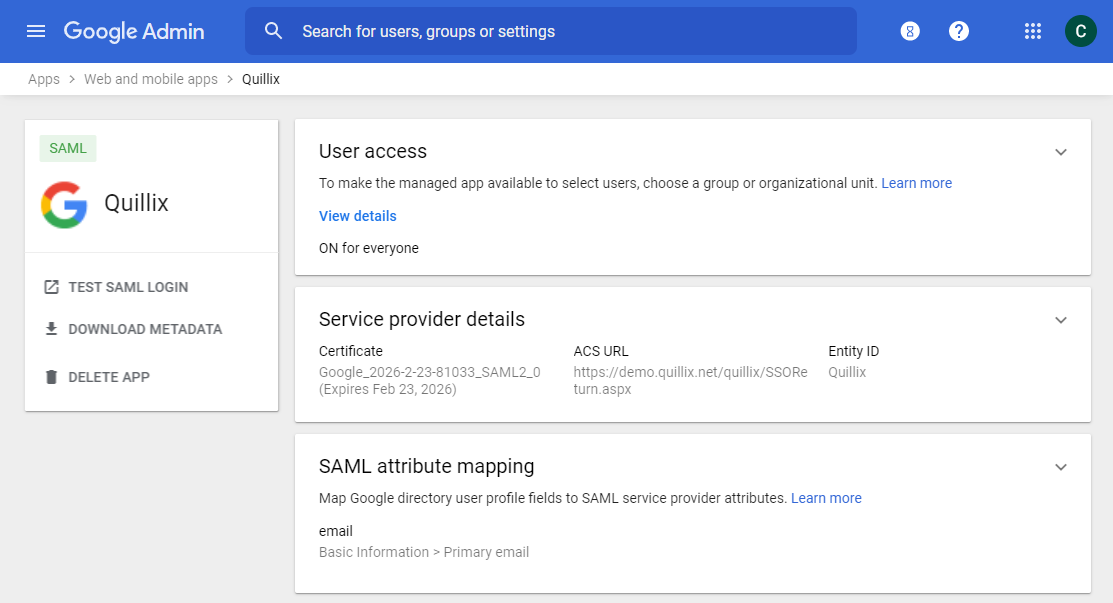
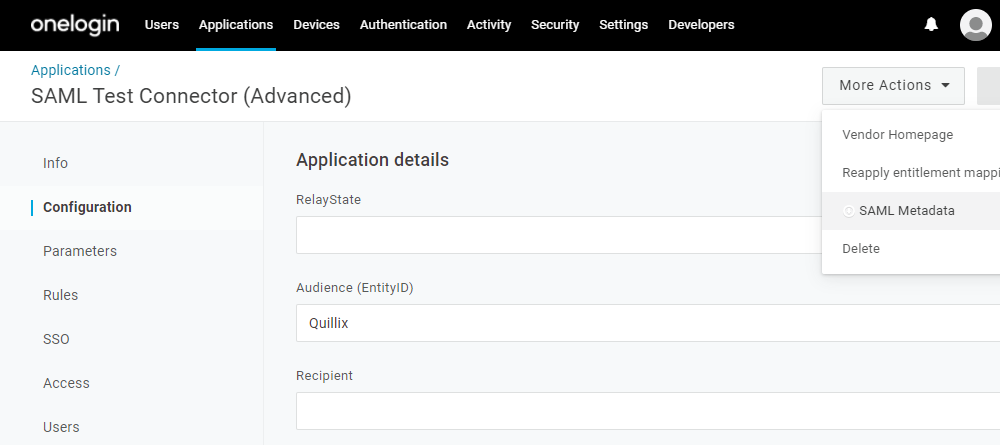
Quillix needs three pieces of information from the ID Provider (IdP): the EntityID, Provider URL and a Certificate. The IdP will usually make this information available in an XML Metadata file.

Figure 2 - Google SAML Metadata

Figure 3 - OneLogin SAML Metadata
If you have a metadata XML file, use the 'Import' button to load the metadata. If not, enter each value in the appropriate field. Also, ensure that the EntityID field is correct. The value in the metadata XML file isn't always correct. For example, the Google SAML shown above uses 'Quillix' as the EntityID. But, the metadata XML file has a different value for the EntityID.
The EntityID field is sent to the IdP in the SAML Request message as the "Issuer". The return URL is also passed to the IdP in the SAML request. The return URL is SSOReturn on the website. (If the usual landing page for the website is https://customer.com/quillix/login.html, the return URL is https://customer.com/quillix/ssoreturn.) After the user is authenticated by the IdP, Quillix will use the Subject's NameID from the SAML assertion to lookup the user in the Quillix User database by Login. Any format is acceptable for the NameID, but the value used must be unique in the Quillix User database. If you create the users in the Process Manager, use the value you expect to receive from the IdP. If you use auto-provision, Quillix will create the users automatically using the value in the NameID.
After following the steps above, accounts may be created using the steps outlined in the topic Creating Users and Groups. Each account created will be added to the system as a "SAML" account type. Be aware that at this point the account has no Quillix Client permissions to use batch profiles, document types, or workflow queues. You must configure these settings to complete each account's setup.
Instead of creating all the user accounts ahead of time, you can check the 'Use auto-provisioning' checkbox and provide a Group. Setup this Group with any permissions that you want the SAML users to have by default. Then, on login, Quillix will automatically create an account for any authenticated SAML user and the user will inherit all the permissions from the Group.