A Web Client based database lookup is configured for specific Document or Batch Index Fields, and dynamically fills index fields with values already stored in an external database. The lookup reduces the amount of data entry a Quillix user must perform in order to index a batch or document. Unlike the automated version, however, a user has to initiate this type of lookup from the Quillix client. The user does this by placing his or her cursor into a field, entering an index value into the field, and then hitting the TAB key to exit the field.
Since all Quillix clients are Web-based, a database lookup can be initiated by any Quillix client user from anywhere in the world. The index value entered as the SQL query key is passed by means of a Web service to the external database. If a matching record is found in the database, the information is returned to the Quillix client, also by way of the lookup Web service, and loaded directly into the index fields.
Database Lookup and Index Validation functionality in the Quillix Web Client are accomplished by configuring a database lookup for a specific field. To configure a database lookup, check the Trigger a database lookup check box in the Index Fields pane under the field you wish to use to trigger the lookup.
Click on the Edit button to open the Database Lookup Wizard.
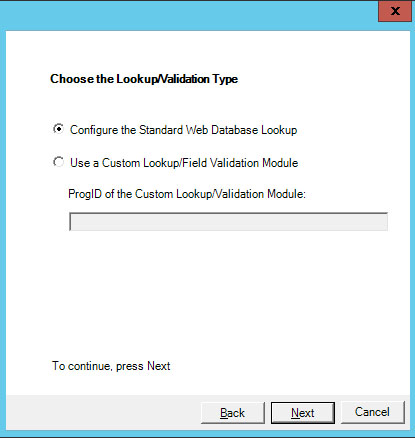
Select the option to Configure the Standard Web Database Lookup and click Next.
Figure 1 - Web Database Lookup Wizard
Select the Database Connection Type (OLE DB or ODBC) from the Wizard Dialog. If this is this first time using the wizard for a new Database Lookup, make sure the Use previously configured connection information check box is not checked, then click Next.
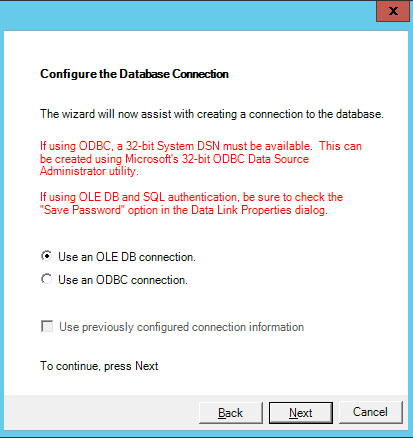
Figure 2 - Database Connection Type
For OLE DB Connection Types, a Data Link Properties dialog will be displayed. From the Data Link Properties dialog connection tab, configure the provider and connection properties (picture shown for example only).
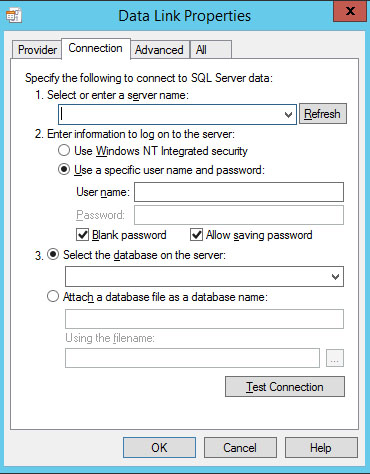
Figure 3 - Data Link Property Dialog
For ODBC Connection Types, select the Data Source and provide the User ID and Password for the selected Data Source. Note: a valid SYSTEM ODBC Data Source must be configured before completing this step.
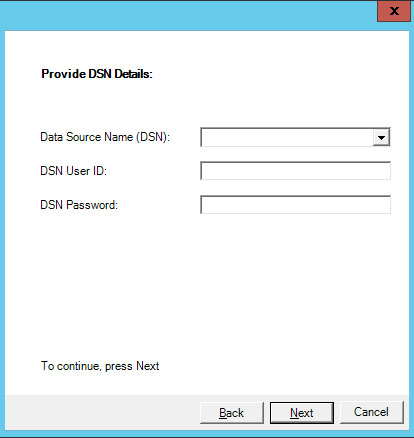
Figure 4 - ODBC Data Source Settings
Select Use the Wizard to Create a Simple Query then click Next.
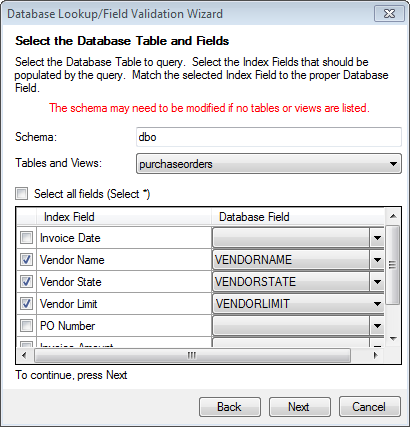
Select the table to use for the lookup from the drop down list, then check each Quillix field to populate, choosing the corresponding column from the table to populate each field. Click next when all selections have been made.
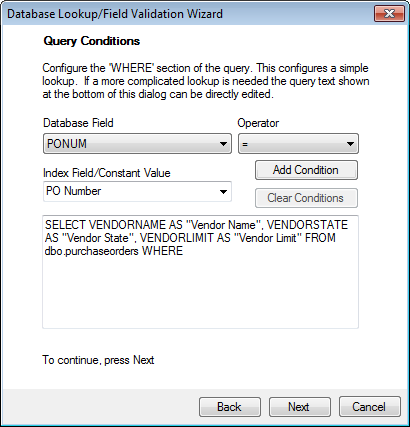
Select the column to use for the "where" clause for the lookup, and the Quillix field to use for the query. Click next when all selections have been made.
Check the desired General Settings check boxes for lookup behavior as follows:
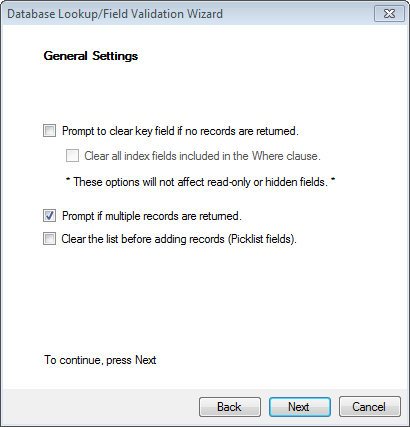
Prompt to clear key field if no records are returned: This option will cause the value entered in the lookup field to be cleared if no matches are found in the database.
Clear all index fields included in the Where clause: This option will cause all additional key fields in the where clause to also be cleared.
Prompt if multiple records are returned: This option will display a selection dialiog if the lookup returns multiple records from the database.
Clear the list before adding records: This option is only used if a field being populated is a pick list. When set, this option will cause the existing list entries to be cleared before populating wit results from the lookup.
Review the SQL Query and make any changes WITH CAUTION as desired, the click Finish.