Quillix Capture uses a multi-server architecture to allow for seamless scalability, load balancing and server fault-tolerance. Multiple servers are not required in order to run Quillix Capture, but at least one Server Group must be configured with at least one Server in order for Quillix Capture to operate.
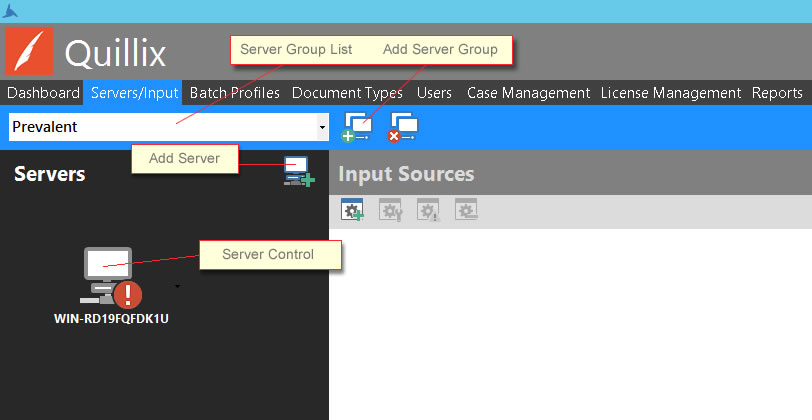
Server Groups are created and administered from the Servers/Input panel in the Quillix Capture Process Manager.

Figure 1 - Servers/Input Panel
To create a new Server Group, click the Add Server Group button on the toolbar next to the Server Group List. Enter the name of the Server Group you wish to create at the prompt and click Ok. The newly created Server Group will now appear in the Server Group List.
With the newly created Server Group selected in the Server Group List, click the Add Server button.

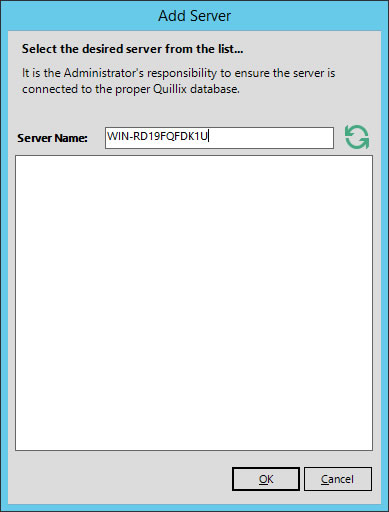
Figure 2 - Add Server to Group
From the Add Server dialog, select a Quillix Server from the list, or manually enter the Server Name in the Server Name Field, and click Ok. A Quillix Server Icon will be displayed in the Servers sidebar when successfully added to the group.
Server Icon Status
The Icon representing each Quillix Server in the Server List will change according to its current running status. When a server is initially added to a Server Group, its status will be STOPPED (not running). The server icon will change when it is RUNNING.
The Quillix Capture Server must be started (running) in order to process items through its various workflow processes.
The Capture Web Server will operate even if the Capture Server is stopped. This allows for users to access queues and perform work even if the server is offline. However, the server must be running in order for back-end server processes to occur, and for cases to move through their respective workflow processes.
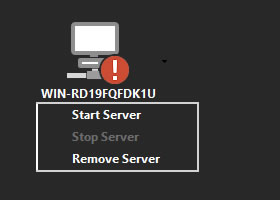
To change the status of a server from STOPPED to RUNNING, click on the desired server icon, displaying the server's context menu. From the menu, click on Start Server.

Figure 3 - Starting a Server
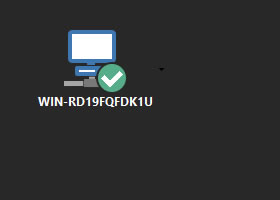
Once the server has started, its icon will change noting it is now RUNNING.

Figure 4 - Server Running
If the server does not start, refer to the troubleshooting topic Server Not Starting
NEXT STEP: Create an Input Source