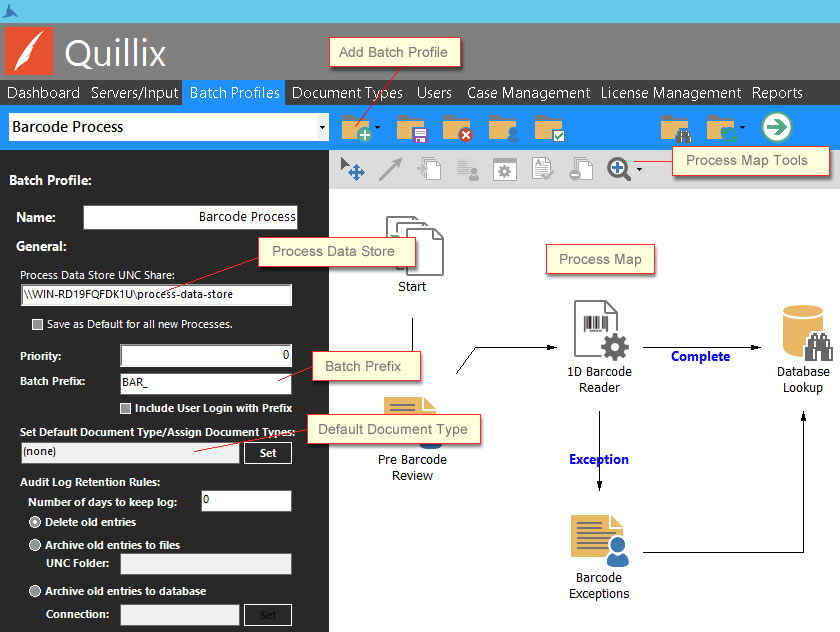
A Batch Profile defines the Workflow Process and Settings for batches in Quillix Capture. Document Capture at the Batch Process Level is primarily about transforming unorganized files and pages into structured documents with indexes. However, Quillix Capture is powerful and flexible enough to be used for many additional Business Workflow Processes in addition to Capture and Document Transformation.
At a minimum, a Quillix Capture Batch Profile must have:
Create a new Batch Profile by clicking on the Add Batch Profile button from the Batch Profile toolbar in the Batch Profiles panel of the Quillix Capture Process Manager.

Figure 1 - Batch Profiles Panel
Enter the name of the Batch Profile you wish to create at the prompt and click Ok. The newly created Batch Profile will now appear in the Batch Profiles List.
The Process Data Store is a location on a server or network where documents and files are stored during their lifetime in the Quillix Capture System. The Process Data Store can be unique to a single Batch Profile, or it can be shared among several, or even all, Document Types and Batch Profiles.
Enter a valid UNC path to the Process Data Store in the Process Data Store field.
The Process Data Store field is a required field. The format for the Process Data Store field should be as a Windows UNC share name, even if the location is local to the machine the Server is running on. Local drive letter designation is not supported.
Batch Index Fields are Optional, but can be very useful in some applications. Batch Index Fields are associated with a Batch, not documents directly. However, any Document Index Field with the same name as a Batch Index Field will be automatically populated with any value in the Batch Index Field when a new document is created from the batch.
Click on the plus sign "+" next to the Index Fields caption to add a new index field.
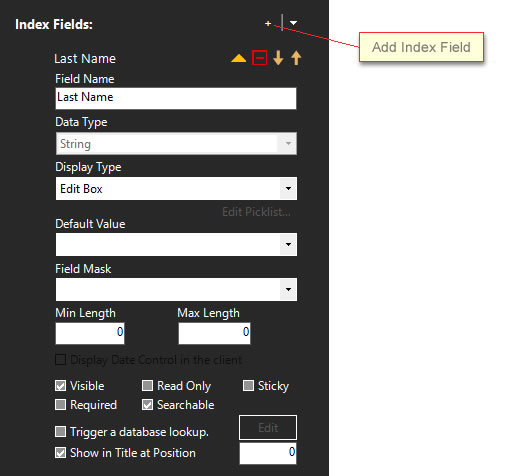
Figure 2 - Add Index Field
When a new Index Field is added, its fields and properties will be displayed in the Index Field sidebar. Enter the appropriate values for these fields and click the Save button on the Batch Profiles toolbar.
With the newly created Batch Profile selected in the Batch Profiles List, create a Process Map by placing workflow "events" on the map using the Process Map Toolbar. All process maps must have a Start event and a Stop event. While not required, an Assembly Event is necessary if you want to initiate the Document Level Workflow for each document in the batch.
Place Events
Create or "draw" a process map by placing desired events on the map.
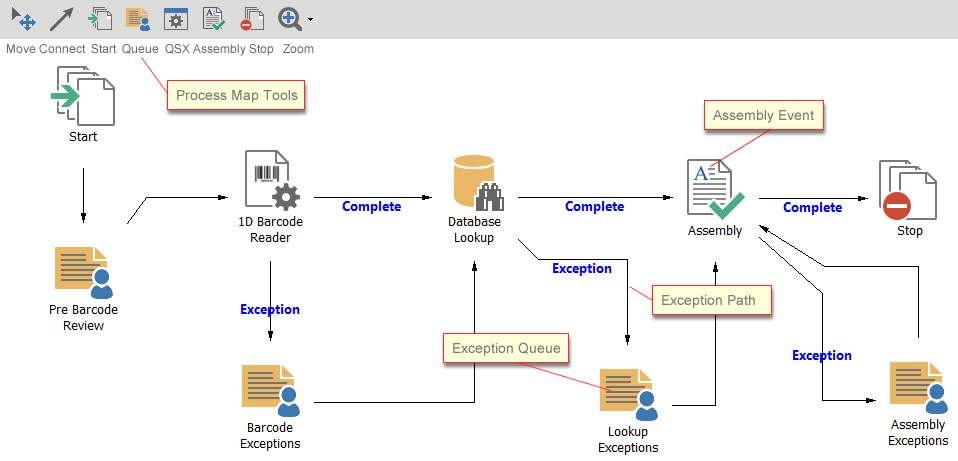
Figure 3 - Process Map
Place a Start event and a Stop event on the map using their respective tools on the Process Map Toolbar.
Place any desired QSX modules on the map by using the Place QSX tool on the Process Map Toolbar. A Select QSX dialog will be displayed allowing you to choose the specific QSX to place on the map.
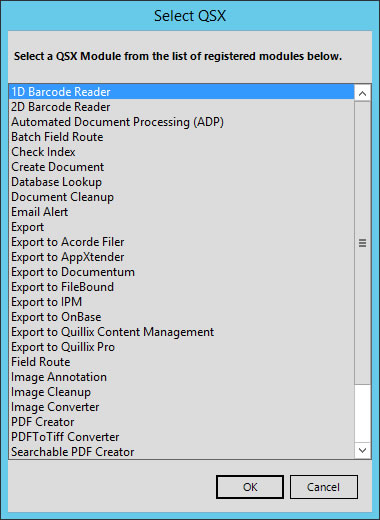
Figure 4 - Select QSX Dialog
Place one or more Queues on the map using the Place Queue tool on the Process Map Toolbar. Queues are used to present batches and documents to task or knowledge workers, and as a place to hold exceptions (cases that could not be processed by a QSX module due to an error condition).
Configure QSX Events
To configure a QSX, right-click on the QSX icon and then click Configure. This will display the specific configuration dialog for the QSX. Enter the required settings for the QSX and click on Ok.
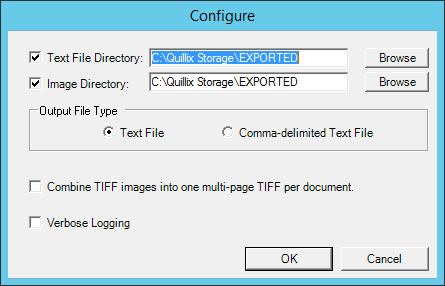
Figure 5 - Export QSX Configuration Dialog
Configuration Dialogs for QSX modules are different for each QSX type. The configuration dialog shown here is specifically for the Export QSX as used in this example.
Connect Events
Once the desired events have been placed on the process map, connect them in the desired order of process flow using the Connect tool from the Process Map Toolbar.
The next step in the creation of a new Batch Profile is to Activate the Process Map. Click on the Activate button on the Batch Profiles toolbar in order to activate the map. The activation process will prompt the administrator to add the Batch Profile to an existing Server Group.
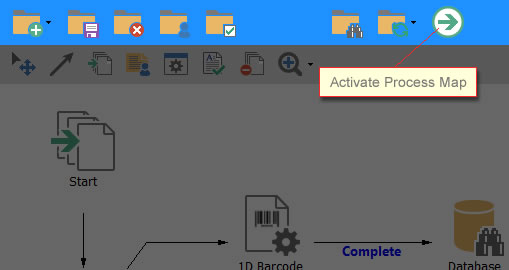
Figure 6 - Activate Process Map
A Process Map must be activated in order for queues and events to be visible to the server and users.
If for some reason there was no Server Group available to add the Batch Profile to at the time of activation, the Batch Profile may be added manually. Click the Add Batch Profile Button on the Servers/Input panel in Process Manager.
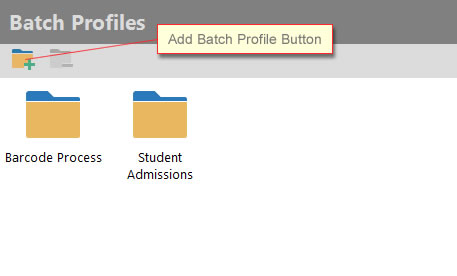
Figure 7 - Add Batch Profile
From the Add Profile Dialog, select the Batch Profiles you wish to add to the selected Server Group and click OK.
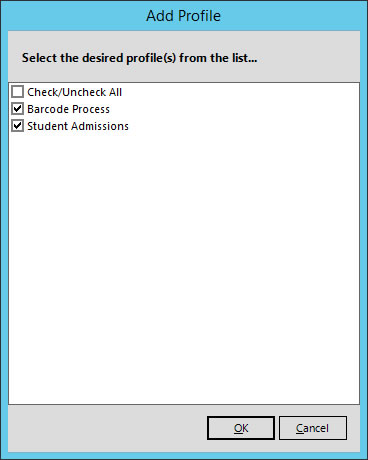
Figure 8 - Add Profile Dialog
NEXT STEP: Creating Users and Groups