The Email Import QSX is a Quillix Input QSX that a Quillix Server can use to capture emails and attachments. The QSX creates a new batch out of each imported email, and sets Batch Profile Index Fields to the selected metadata.
The QSX Configuration Dialog provides settings for General Info, Indexes and other options. The QSX Configuration Dialog is accessed by either double-clicking on an instance of the QSX, or by right clicking on an instance of the QSX on a capture process map, and clicking on Configure.
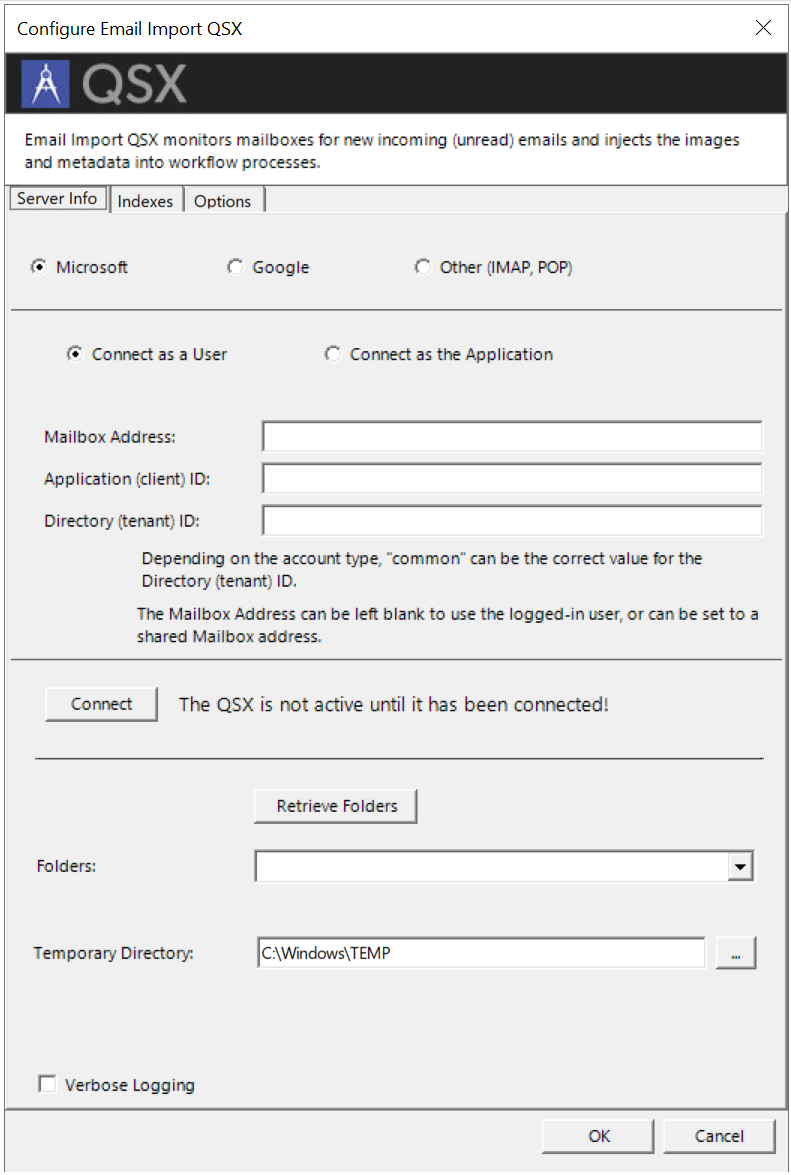
The first tab on the QSX Configuration Dialog is used mostly to provide connection information for the selected Email provider. There are additional options for setting the Folder to monitor, Temporary Directory and to enable Verbose Logging.
Figure 1 - Email Import QSX - General Info
When importing email with Microsoft or Google as a user, we use an OAuth token. This token comes in two parts: an access token and a refresh token. The access token normally expires after one hour. The refresh token lasts longer and is used to acquire a new access token without user intervention. However, the refresh token duration is determined by the issuer of the token (Microsoft or Google) and can last anywhere from one day to one year. When it expires, the Email Import QSX will not be able to import email until you run the configuration again and use the 'Connect' button to go through the interactive process. For this reason, we recommend that you use the 'Connect as the Application' option with Microsoft or Google.
To import email with Microsoft as a user, click here.
To import email with Microsoft as an application, click here.
To import email with Google as a user, click here.
To import email with Google as an application, click here.
To import email with an IMAP or POP server, click here.
When the above steps are complete, the QSX should be connected to the server. If not, click 'Connect'. When the connection is made, the 'Folders' drop-down list should show the available email folders for the email account. Microsoft accounts need to use the 'Retrieve Folders' button to fill the list. Select the desired email folder from the 'Folders' drop-down list.
Indexes Tab
The second tab on the QSX Configuration Dialog is used to set the Quillix Batch Profile and to map Batch Profile Index Fields to the email metadata.
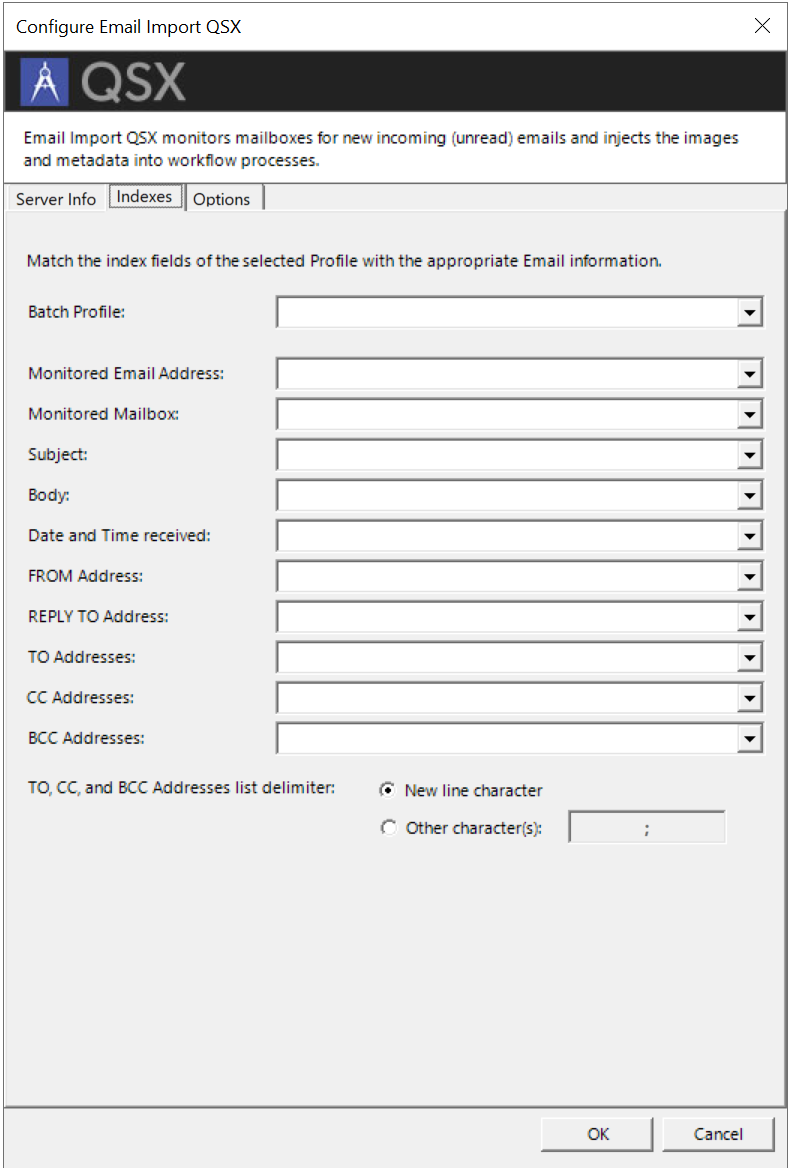
Figure 2 - Email Import QSX - Indexes
|
Quillix Profile |
Sets the Batch Profile to be used when importing emails. The Batch Profile Index Fields used for assigning metadata come from this Batch Profile. |
|
Monitored Email Address, etc. |
This setting and the ones that follow tell the QSX to write the metadata retrieved from the email to the selected Batch Profile Index Field. |
|
To, CC, and BCC Addresses list delimiter |
Tells the QSX what character to use as a delimiter between each address read from the email. |
The third tab on the QSX Configuration Dialog is used to set additional options for the QSX.
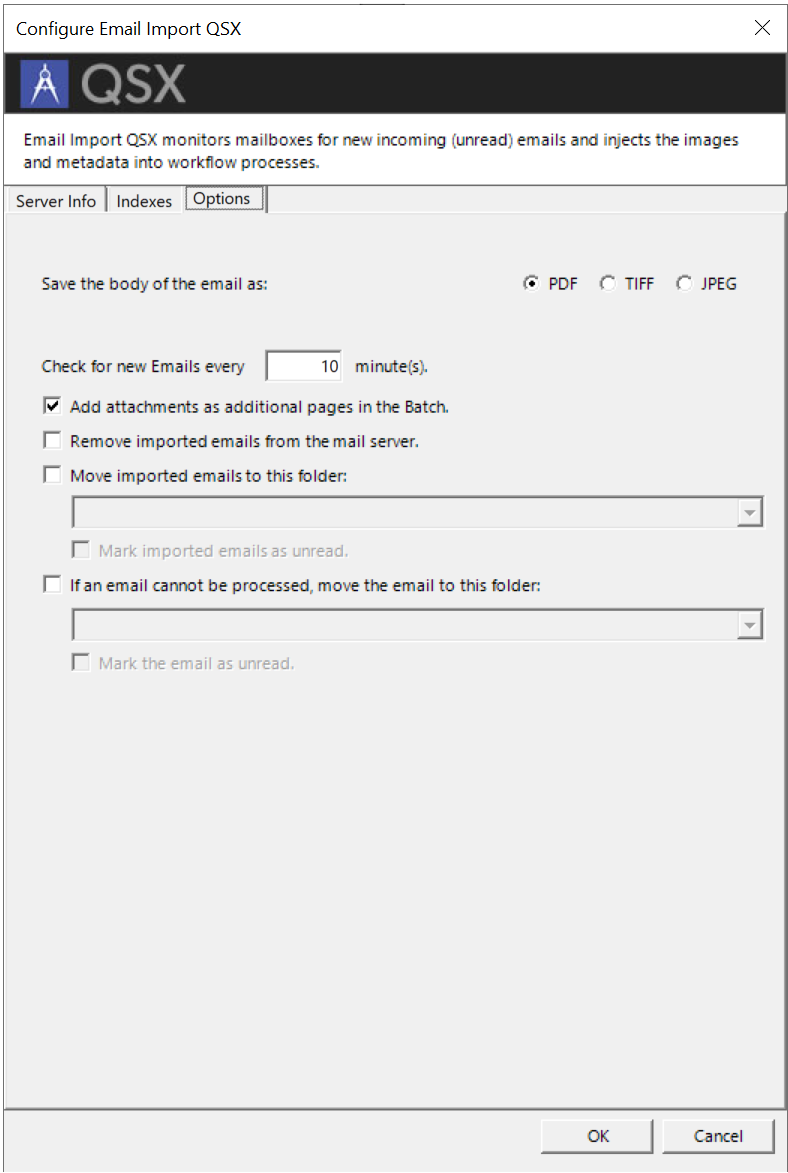
Figure 2 - Email Import QSX - Options
|
Save the body of the email as |
Tells the QSX the file format in which to store the body of the email. The body is stored as a page in the batch, either as a PDF, TIFF, or JPEG file. |
|
Check for new Emails every x minutes |
Tells the QSX how often to check for new unread emails. |
|
Add attachments as additional pages in the Batch |
Tells the QSX to add the email's attachments as additional pages in the batch. |
|
Remove imported emails from the mail server |
Tells the QSX to delete imported emails rather than only marking them as read. |
|
Move imported emails to this mailbox |
Tells the QSX to move imported emails to a separate mailbox. This enables an additional option to mark the email as unread. |
|
If an email cannot be processed, move the email to this mailbox. |
Tells the QSX what to do with emails it cannot import. This enables an additional option to mark the email as unread. |