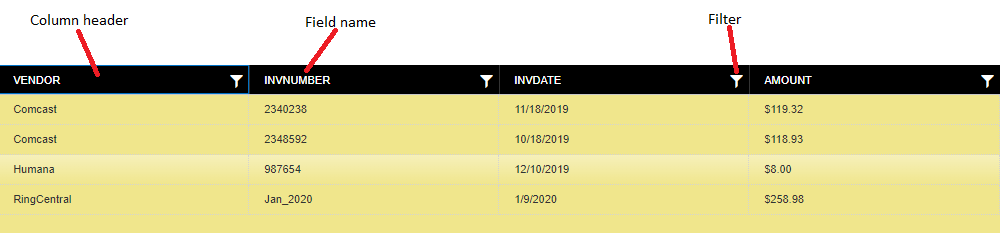
A Document List is found on each Result Panel and shows the results of a search for documents. Each row in the list is a single document in the repository. The field names are shown in the header at the top of the list.
To sort the list, click on a column header. The first click will add an arrow beside the Field name in the column header and sort the list in ascending order. A second click will sort descending and a third click will restore the original order. Starting with version 5.2, this new sort order will be used when adding or clearing a filter. The indicator will be removed from the column header, but the results returned by the server will be in the desired order.

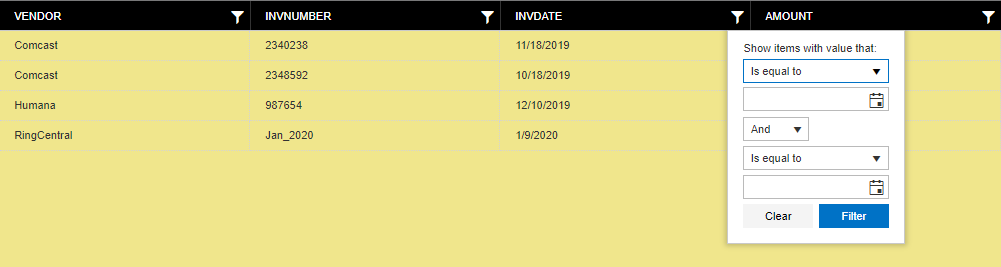
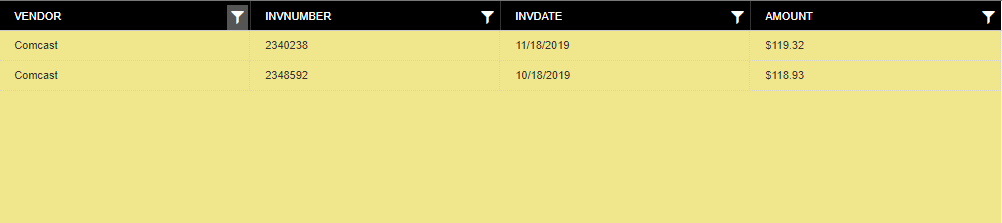
The Filter icon on the column header allows you to set a filter for that column. Previously, filtering only removed documents from the document list; it did not retrieve additional documents from the server that match the filter. Starting with version 5.2, adding a filter modifies and re-executes the search. The new filter is added to the Search Criteria area of the Results Panel. Filters are shown with blue text and can be removed by clicking on them. Removing a filter, like adding a filter, causes the search to be re-executed. Every filter that is added restricts the returned set of records. It does not expand it. For example, suppose we set a filter on the list shown below for 'Vendor = Comcast'. That would run and give us a list of only the two Comcast records. Now, if we add another filter for 'Vendor = Humana', we will get an empty list. There are no records where the Vendor field is both Comcast and Humana.
The Filter icon gets a different background when a filter has been set. You may click the Filter icon to clear the filter. You may also set filters on multiple columns at the same time. Starting with version 5.2, filters are added to the Search Criteria and the Filter icon is not changed. You may click on the filter in Search Criteria to clear it.
In-place editing is an optional feature that may be disabled by your System Administrator. If you would like to use this feature, please contact your System Administrator.
If you have the 'Edit' privilege, a long-press (click your mouse and hold the button down for 1/2 second) on a field value will open an editor so you can enter a new value for the field.

The type of editor displayed depends on the data type of the underlying field and will help to ensure that the value entered is appropriate for the field. When your entry is not valid, the editor will have a red border as in the image above. To save your change, you can use the 'Enter' key or click anywhere in the Client application. If the editor has a red border when you save the change, the change will be rejected and not saved and you will not get an error message. To cancel changes, simply use the 'Escape' key on your keyboard.
A right-click on the document list will show a context menu.
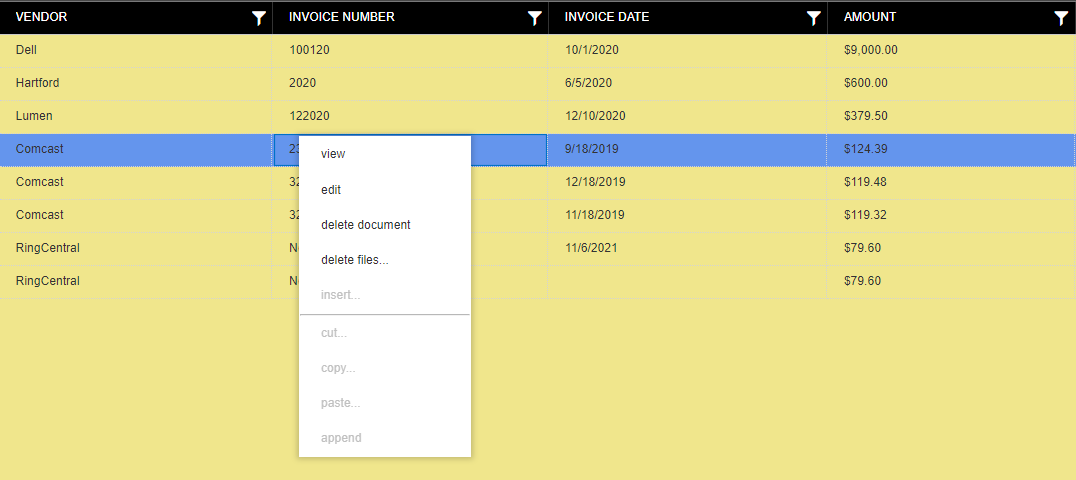
View will display the files for the selected document. This can also be accessed by double-clicking the row.
Edit will open a dialog so you can enter a new value for the field. The dialog can be dismissed by clicking the 'Save' or 'Cancel' buttons.
Delete Document will delete the selected document.
Delete Files will display a dialog to allow you to select one or more files to delete from the selected document.
Insert will allow you to insert one or more files into the selected document and specify their location in the document.
Cut will display a dialog to allow you to select one or more files to remove from the selected document. These files are added to the clipboard and may be Pasted or Appended to another document. Cut files may only be Pasted or Appended one time. The files are not removed from the document until they are Pasted or Appended.
Copy will display a dialog to allow you to select one or more files to copy from the selected document. These files are added to the clipboard and may be Pasted or Appended to another document. Copied files may be Pasted and/or Appended multiple times.
Paste will display a dialog to select the insertion point in the selected document. Then, the files on the clipboard are pasted into the document at that location.
Append will add the files on the clipboard to the end of the selected document.
If you do not have the necessary privilege for the action, the action will be ignored.
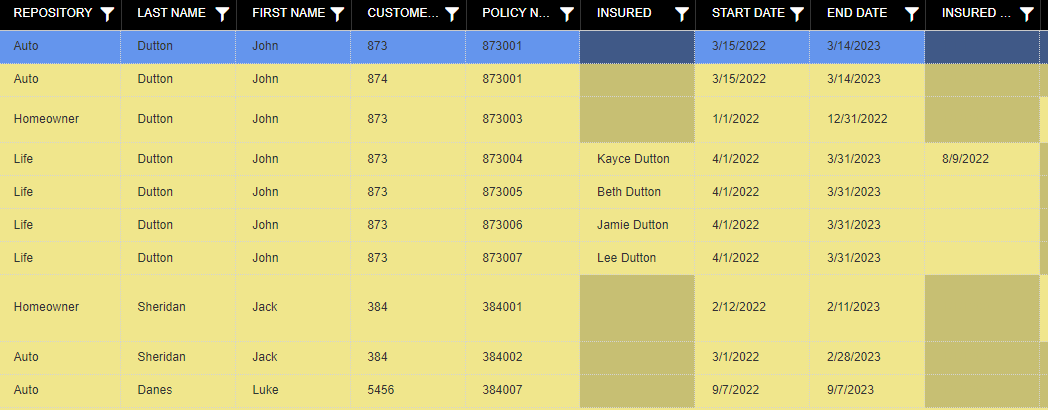
Linked Queries always display the name of the repository in the first column. Each row in a linked query can come from a different query or repository. Since your permissions are assigned by repository, when viewing a Linked Query, your permissions may change from one row to the next. Also, some rows may not have values for all of the columns shown. In the example below, Auto and Homeowner rows do not have the column 'Insured'. Those cells are drawn in a slightly darker color and will not allow edits.