Repositories are managed through the QCM Control Center on the Repositories tab.
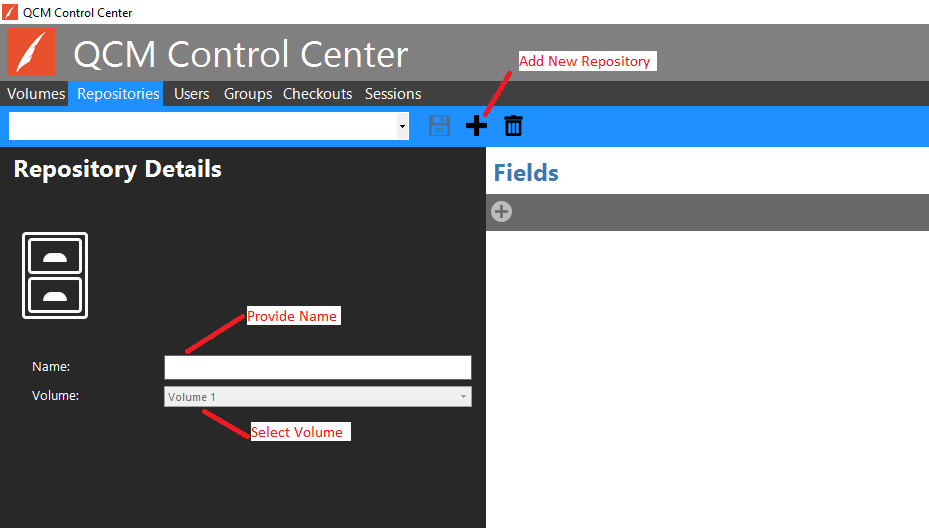
To add a new Repository, click on the Add New Repository button on the toolbar on the Repositories tab. Provide a name for the Repository and select the correct Volume to use.
Figure 1 - Repositories Tab
To add a new Field, click on the Add a new Field button on the toolbar on the Repositories tab.
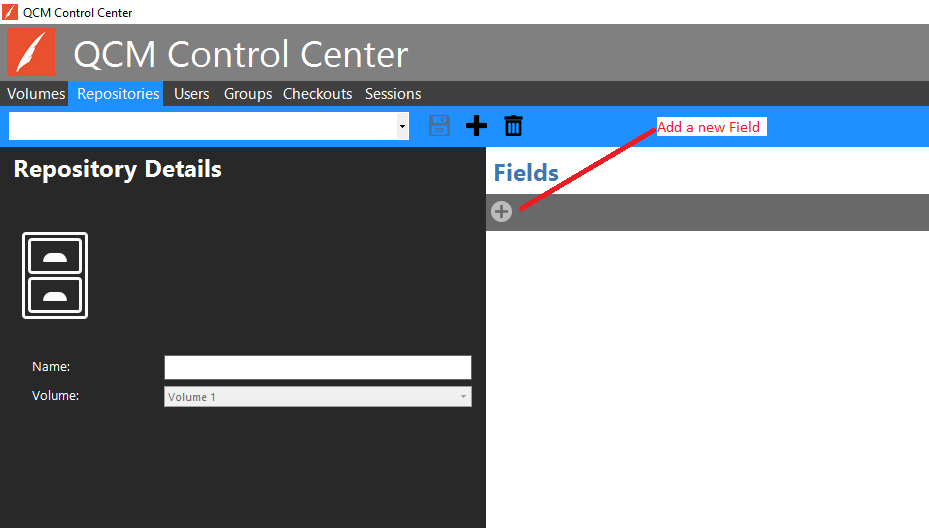
Figure 2 - Repositories Tab
The Name field in the resulting dialog is the name that will be used for the database column. It cannot include spaces or special characters. The Display Name is what the Field will be labeled as when seen in the QCM Web Client. Length applies only to the String Data Type. Input Mask and Picklist can be selected from the list of available Input Masks and Picklists, or the add/edit/view details option can be used to add a new Input Mask or Picklist.
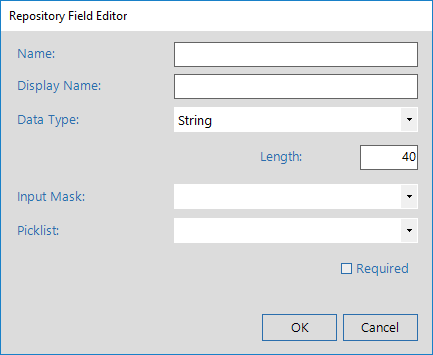
Figure 3 - Repository Field Editor
Name and Data Type cannot be modified once the Repository has been saved. The Required check box is not available once the Repository has been saved.
Queries cannot be added to the Repository when there are any changes that are unsaved. Click on the Save button on the Repositories tab to make the repository active.
To add a new Query, click on one of the Add buttons on the toolbar of the Repositories tab. The first button will create a Standard Query. The second button will create a Linked Query.
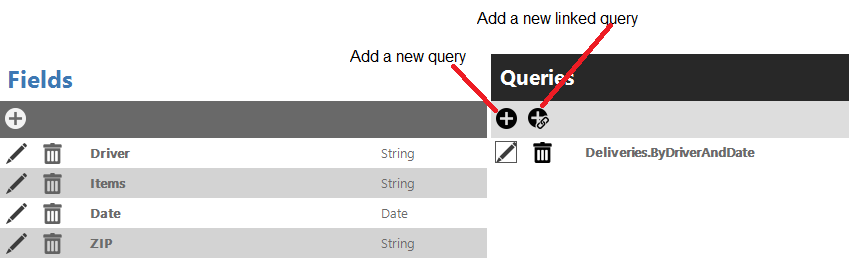
Figure 4 - Repositories Tab
Standard Queries are created in the Query Designer.
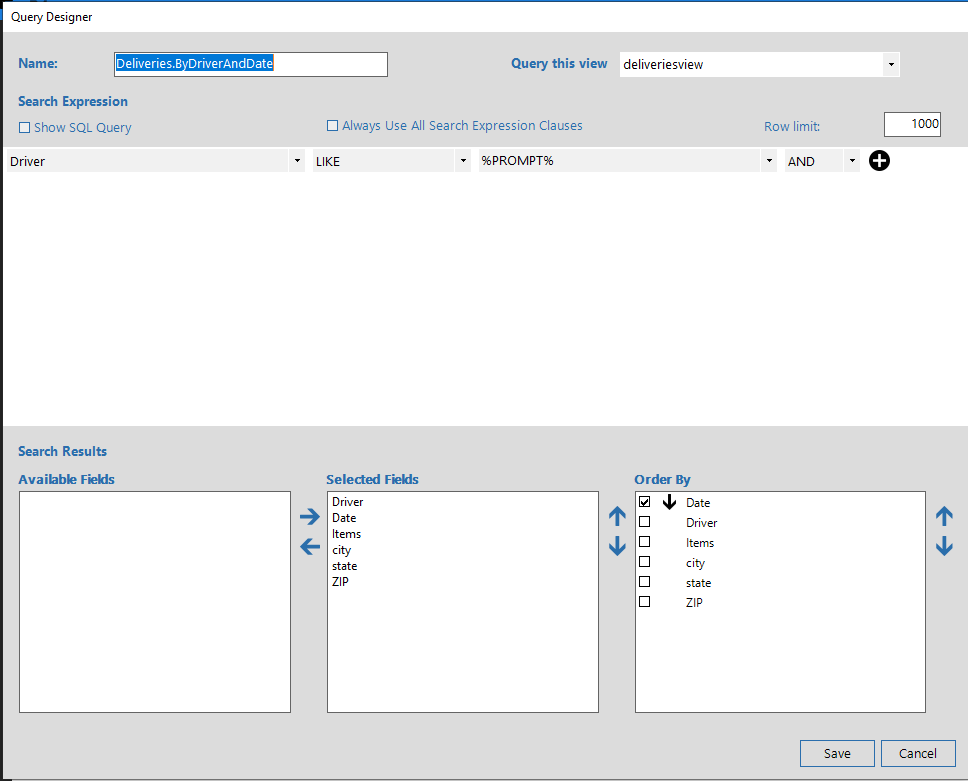
Figure 5 - Query Designer
A SQL Query is generated from this dialog. Consider a simple SQL Query: 'Select FirstName, LastName from Employees where EmployeeID = 1 order by LastName asc'. The Search Expression is the 'where EmployeeID = 1' portion of the query. Selected Fields is the 'Select FirstName, LastName' portion, and Order By is, of course, the 'order by LastName asc' portion.
By default, a query will select from the repository table; Employees in the example above. But, you may choose to query a view instead by selecting the view from the 'Query this view' field. The view must include at least one data field and the docid and groupid columns from the repository table. Querying a view allows you to join to external tables to display additional information. With the use of Linked Servers, you can link to tables in another database or server.
The Show SQL Query checkbox can be checked to see the SQL Query that is being generated by your selections. The 'Always Use All Search Expression Clauses' option ensures that none of the Search Expression clauses are dropped if left blank in the QCM Web Client search. Dropping unused clauses was the default behavior for QCM Version 4 and below.
The Name field is the name seen in the QCM Web Client. It must be unique across all Repositories.
Important! By default, Queries may not be used by the QCM Web Client exactly as written. Unused clauses are dropped if left blank during a search in the QCM Web Client. This especially affects complex queries using parentheses to denote order of operation. Check the 'Always Use All Search Expression Clauses' option to run queries exactly as written.
Linked Queries combine two or more Standard Queries into a single entity. They are created in this dialog:
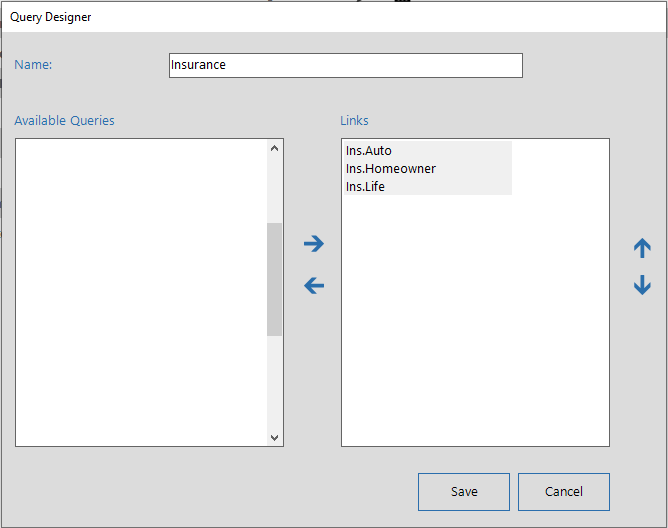
Provide a name for the Linked Query and move two or more Standard Queries from the 'Available Queries' list to the 'Links' list. A Linked Query combines the prompts of each link to execute the Links together as a single query. Likewise, the results are combined into a single grid. Prompts and Fields with the same DisplayName are combined.
For example, assume that we have three repositories named 'Auto', 'Home' and 'Life'. We have created a query named 'Ins.Auto' for the 'Auto' repository that is defined as shown here:

We have created similar queries named 'Ins.Home' and 'Ins.Life' for the 'Home' and 'Life' repositories respectively. We also created the Linked Query named 'Insurance' and assigned these three queries as Links. When the user selects the 'Insurance' query in the Quillix Web Client, they will see three prompt fields: Last Name, Policy Number and Customer ID. When they execute the search, the same prompt values will be sent to each of the Links and the results will be combined into a single result grid on a Result Tab. Columns with the same display name, like 'Last Name', 'First Name' and 'Customer ID' will be combined into the same column in the grid.
Do not combine columns that have different data types. For example, if 'Customer ID' is a number in 'Auto', but a string in 'Home', make sure that both columns have different display names.
Next Steps